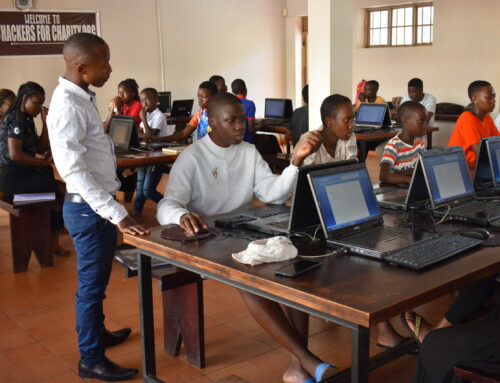
We’re thrilled and blessed to have a 3D printer, thanks to the hacker community. When fellow volunteers, friends and donors approached me with the idea of buying us a 3D printer for our Jinja, Uganda hackeraspace, I was excited about the idea although I had no clue what we would do with it.
When I mentioned that, my volunteer/friend/donor said simply, “Every hackerspace needs a 3D printer.”
And that was that. We had a 3D printer.
This is my story of how we went from zero-knowledge about 3D printing to successful prosthetic prints and a massive robotics undertaking thanks to the Ultimaker 2 (UM2) and the support of the hacker community.
Mark brought the UM2 over from the U.S. and we nerded out for days on end. Mark had never seen one a 3D printer action and neither had I. We were complete and utter n00bs. But man, we had fun!
I still remember when we first powered on the UM2. I was mesmerized by the sound. Right out of high school, I worked at the local community college in their computer center. The massive air conditioning system blew all day and the massive PDP-11’s and Vax 11780’s churned away, creating a pleasing white noise that I came to associate with “home”.
When we powered up the UM2, the fans kicked in, white noise re-entered my life and just like that, I was “home” again. I’ve been in Africa seven years now, and I missed that sound, and in some strange way, the UM2 felt like “home”. We joked about it, but it was a settling experience for me and I was instantly excited about the future with the UM2 and the world of 3D printing.
We printed some goofy test prints with the included Ultimaker silver PLA (Polylactic acid, a primary 3D printing material), then spread our wings and slapped in some “other brand” ABS (Acrylonitrile butadiene styrene, a tougher, but much more cantankerous material). All hell broke loose. We were treated to crappy prints, clogged nozzles, nasty fumes and eventually, smoke coming from the heater block. Then, mid-print, we lost power. This is expected in Africa, but the Ultimaker was not prepared. The nozzle froze, fractions of a millimeter above a quickly-hardening plastic surface, while warm filament continued to ooze from the heated nozzle head. Within moments, the nozzle was trapped, lodged in a plastic prison.
I panicked. I knew nothing about 3D printer maintenance, and I couldn’t order spare parts thanks to shoddy mail delivery, corruption and a 56% import and customs tax.
Fear crept in and it was paralyzing. I didn’t want to clean up the clogged nozzle mess for fear of “breaking” the UM2 even more. The future seemed bleak because even if I managed to recover from this mess, I’d be afraid to use the printer for fear of “breaking” it again. Not to be overly dramatic but I really felt stranded on a deserted island with this thing, clueless and all alone.
I realized that 3D printing might just be a thing for the developed world, where spare parts and knowledgeable technicians are readily available.
Mark left, and life caught up with me. My oldest kids were preparing to leave Africa to attend college in the U.S. and that was my priority. The UM2 sat, dejected, nothing more than an idle curiosity for our new African hackerspace.
But I thought about that printer often. It still held mystery for me and as a hacker, I couldn’t just accept defeat and let it go.
I had learned a few things in my short experience with the UM2 and terms like “material temperatures”, “nozzle flow”, “layer heights”, and “optimal chamber and bed properties” bounced around in my head.
This week, after a several month hiatus, my life calmed down enough to allow me to return to the Ultimaker 2. I recalled, with a bit of sadness all the problems we had and I realized that everything went down hill with that bad “off brand ABS filament”. I vowed to start over and avoid that filament until I got my legs back under me.
I started the machine, leveled the bed, cleaned the nozzle, put in a fresh roll of filament and did a test print. It was decent, but just a bit off. I called Ultimaker tech support, spoke to an actual (kind, knowledgeable) human being that pointed me in the right direction. I consulted the (amazing) Ultimater forums and got an immediate response. I had a badly clogged nozzle.
I went through an “Atomic cleaning” process that involved manually feeding in filament to the heated nozzle, letting it cool (and harden) and then yanking it back out of the nozzle.
The first time I did it, the result was shocking. There was a LOT of something black and nasty inside my nozzle. What was most shocking was that I had never used black material. This was seriously nasty stuff.
I re-did the procedure several times, operating at the melting point of PLA (220°C) and found that each time, more junk came out. Eventually though, no junk came out but the filament I pulled out after the cleaning revealed that something was still inside the nozzle. I went back to the forum and was immediately directed to increase the nozzle temperature to 260°C (the melting point of ABS), and miraculously, a huge blob of junk came out of the nozzle. Another pass at 260°C, and my nozzle was perfect.
I did a test print and it was gorgeous, stunning and flawless. We were back on track. Between Ultimaker phone support and the forums, I was back in business in less than two hours after several catastrophic user errors and months of the printer sitting idle. In fact, the printer has never printed better.
Through it all, the UM2 shone. I had fed it bad filament, Africa had thrown horrible power at it, and still it remained nearly bulletproof.
I stil had to contend with the power issue, and although I’ve come to love and depend on Goal Zero equipment as a solar backup, I haven’t figured out how to get their flagship 1250 over to Uganda because it weighs more than a typical airline baggage allowance. So I had to resort to using several car batteries as a backup system for the printer, while we wait for a more respectable solution to arrive.
We also had to make sure that when we had power, we were getting clean power. So we had to invest in a regulator to stabilize the power. At 200 watts, the UM2 is not exactly “low powered” so we had to get a regulator with some kick. This one handles 4000 Watts, just to have a little bit of wiggle room. Notice that we run the UM2 off of 110v although it can handle 220v. But we have some post processing tools (like a heat gun and Dremel) that only run on 110v, so we have electrical tape over the 220v outlet so we don’t accidentally fry those tools. Appropriate technology.
The forums directed me to several after-market add-ons for the Ultimaker 2 including a low friction UM2 spool holder, a (much needed in Uganda) clip-on dust filter (both by a designer named |Robert|) and a UM2 bearing filament guide by Ppyromann. These add-ons put less strain on the feeder motor and made my prints even better, something I thought impossible.
However, each of these builds required part like bearings and screws that were “readily available on Ebay” but took me days to find in various hardware stores in Uganda. That’s a tale for another post, but eventually some of the parts came together.
|Robert|’s low-friction filament spool holder was our biggest print, by far, and it was impressive. The oversized knob was gorgeous, and threaded into the bearing assembly. It was amazing to see those parts come together.
Here’s a photo of the “upgraded” UM2. The red parts are after market, printed by the printer! Yes, this machine is “upgrading itself”!
The dust filter (also by |Robert|) was exceptionally brilliant. It was the first example I had seen of a “print-in-place” design and sported a sealed, working hinge. The little hinged dust filter box printed in one piece and worked right off the printer without assembly.. WITH A SEALED HINGE! This was like some kind of voodoo, almost as magical as the idea of a 3D printer.
These designs opened my eyes to what’s possible for 3D printing and I realized the power of being able to create immediate solutions for real-world problems. Designers like |Robert| are geniuses, hackers, like me but with different skills. I was hooked.
This was a whole new world.
With a working printer, the ideas started flowing. I felt confident enough to dive into something bigger. My first thought was robotics, and the cover of a recent Make: magazine introduced me to the InMoov, a life-size 3D printable robot. This was a massive project, and a bit intimidating to start with, but a spin-off project was creating prosthetic hands for patients in need. I joined the enable community and started a test print of a “Raptor Reloaded” prosthetic hand. I signed up as a fabricator and was requested to print a “Test hand”. This was by far the biggest project I had tackled, and took approximately 12 hours of printing time.
I started with the finger tips, something small and easy. I wasn’t entirely impressed with the quality but I had learned enough to know it wasn’t the printer. The orientation of the part made some nasty ridges on the end of the finger, one of the areas that aesthetically should be the best looking.
I did some sanding, and hit it with a heat gun and it looked much better, but it will be easier to just re-orient it and put the supports inside the joint, where aesthetics won’t matter.
At 5 hours into the print of the gauntlet, the power failed. Fortunately, our batteries and pure sine inverter saved the day. The printer didn’t skip a beat. However, this isn’t nearly a perfect solution because the batteries support the lights and other things when the power goes off and they were flickering. We really are going to have to pursue a dedicated backup, or get a “real” system installed. I’m not sure I’d trust our setup to run for very long, but it works in a pinch and at the very least would allow us time to cleanly abort a print to keep the nozzle form getting stuck in the plastic again.
Finally, it all came together! And just like that, we went from zero to printing prosthetic hands on our Ultimaker 2! Here are some final photos of the Raptor Reloaded hand:
The end result was amazing! I can’t wait to put this hand to use, but we’ll have to wait for the rest of the parts from the US. Jason brings them next week, and then we have to build it and send a video of our test hand to E-nable for approval, and finally they will find a donor. We’re also working with a local hospital that specialized in making prosthetics that has also done a study on 3D printing to see if we can help without having to rely on E-nable to connect us with donors.
This has been an amazing journey so far, and I’m excited about the world of 3D printing. Next stop: we start on our InMoov!


